By Rachel Robbins
Some uses for rainbow rice:
At The Literacy and Language Center, we often give students something to do with their hands. For wiggly little people, this is a great way to get them to focus while still allowing them to move. We also reinforce learning with sensory elements. We’ll have students trace letters or words in the rainbow rice. They can practice tracing vocabulary words or spelling words in it. The increased sensory stimulation helps reinforce their visual pattern recognition. Sometimes students just play with it on breaks. It can be very calming, like a sand tray. Many of our students like to hide toys in the bin, and we’ve all gotten used to sometimes pulling out a ninja turtle, or a dinosaur.
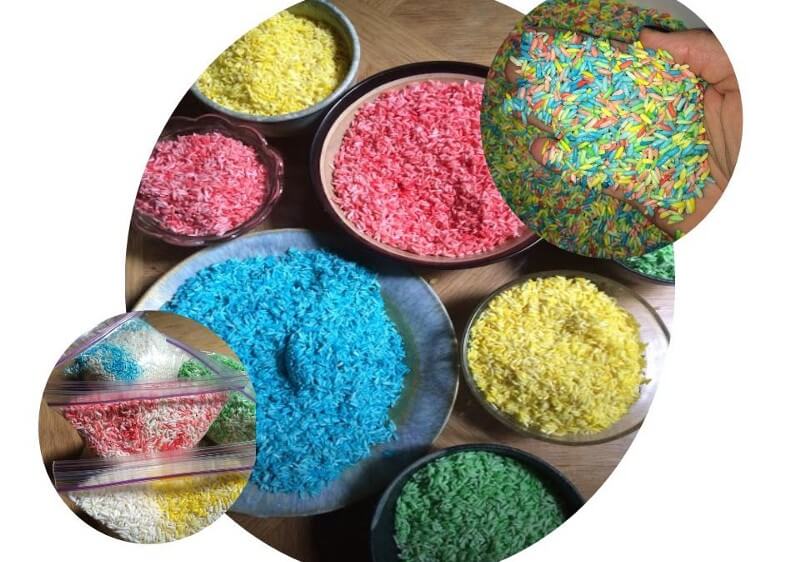
Our students are fascinated by the bin of rainbow rice. They often ask how it was made, and several have asked how to make it at home. So, I decided to post a tutorial. This is an easy project that would be fun to do with kids. It would also provide an opportune moment to teach kids about primary colors. The finished product is a sensory tool that can be used to enhance a student’s learning, or just for fun.
How to Make Rainbow Rice:
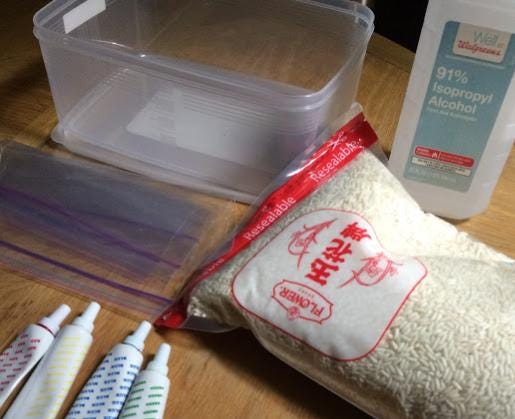
Materials:
-
Zip lock bags*
-
Uncooked white rice in a resealable bag
-
Isopropyl Alcohol
-
Food Colors in the 4 primary colors
-
Several soup bowls and
-
A large mixing bowl
-
A resealable bin or container
*Freezer bags will work best, especially if you’re doing this with kids. The bags are bigger and more durable, making it easier to mix the rice inside. You’ll want a fairly deep bin for storing the finished product. The depth will help reduce the amount that gets spilled. The resealable rice bag will allow you to put some of the product aside to replenish your supply.
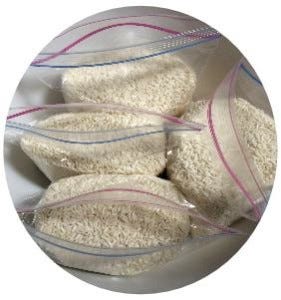
- Begin by separating the rice into zip lock bags. Don’t fill the bags entirely. The fuller they are, the more difficult it is to mix the colors. I did this inside a bigger mixing bowl to prevent mess.

2. Once the rice is separated into bags, add 2 tablespoons of Isopropyl Alcohol into each. I used 91% because it was what I happened to have, less concentrated should work just as well. Shake up each bag to ensure the rice is coated with the alcohol.
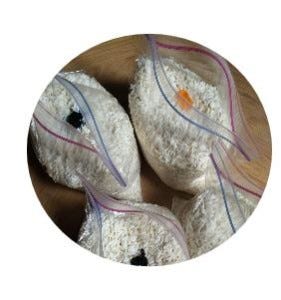
3. Next, add food color. Start with a little (a drop) and add more until you achieve your desired color. I started with just a drop and added the same amount twice. Keep in mind that the dry rice will be a more vibrant color than the wet rice.
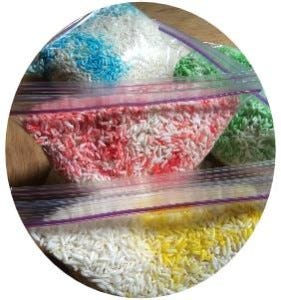
4. Shake the bags in order to mix the colors. If kids are helping, this is a great step for them to take over, especially if you’re using freezer bags. If you’re using zip lock bags, double bag to prevent accidents.
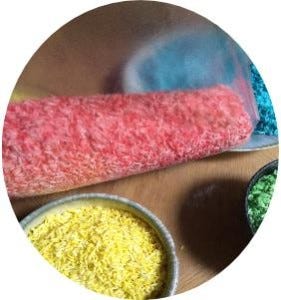
5. Once the color is fairly evenly distributed, pour the rice into the bowls. This is a task best left to adults, as the alcohol fumes can be quite strong. At this stage the rice should still be fairly wet and clumpy. If you see a clump of dye not mixed in, you can stir the rice with a spoon to mix it.
*Don’t mix the different colors of rice until the rice is entirely dry!*
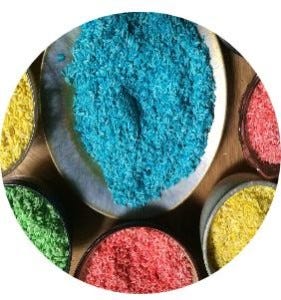
6. Once you’ve transferred all of the colors into separate bowls, put them somewhere out of reach of little hands. I like to let them sit near an open window. Leave them out overnight to allow the alcohol to evaporate fully.

7. Once the alcohol has evaporated, begin mixing the colors together in a big mixing bowl. The rice will be clumpy and hard at first, and may retain the shape of the bowl. Mix it with your hands, encouraging the grains to give up the shape they dried in. This is a good step for kids to help with, and they’ll enjoy watching the colors change as each new color is added.
Once it’s all mixed, pour in enough to coat the bottom of the bin, and put the remainder back into the resealable rice bag. This reduces the amount that gets spilled out.
Cleanup! Spills are easiest to deal with in non-carpeted areas. Bring out the bin in a room with wood or linoleum floors in order to make it simpler to sweep up the grains that escape.

No wonder they love it, it looks like candy! When they ask about eating it, Iexplain how it was made. Typically, students will decide on their own that it’s not really a good idea to put it in their mouths.
And that’s it! Make your own Rainbow Rice and let us know in the comments how it turned out.

Recent Comments